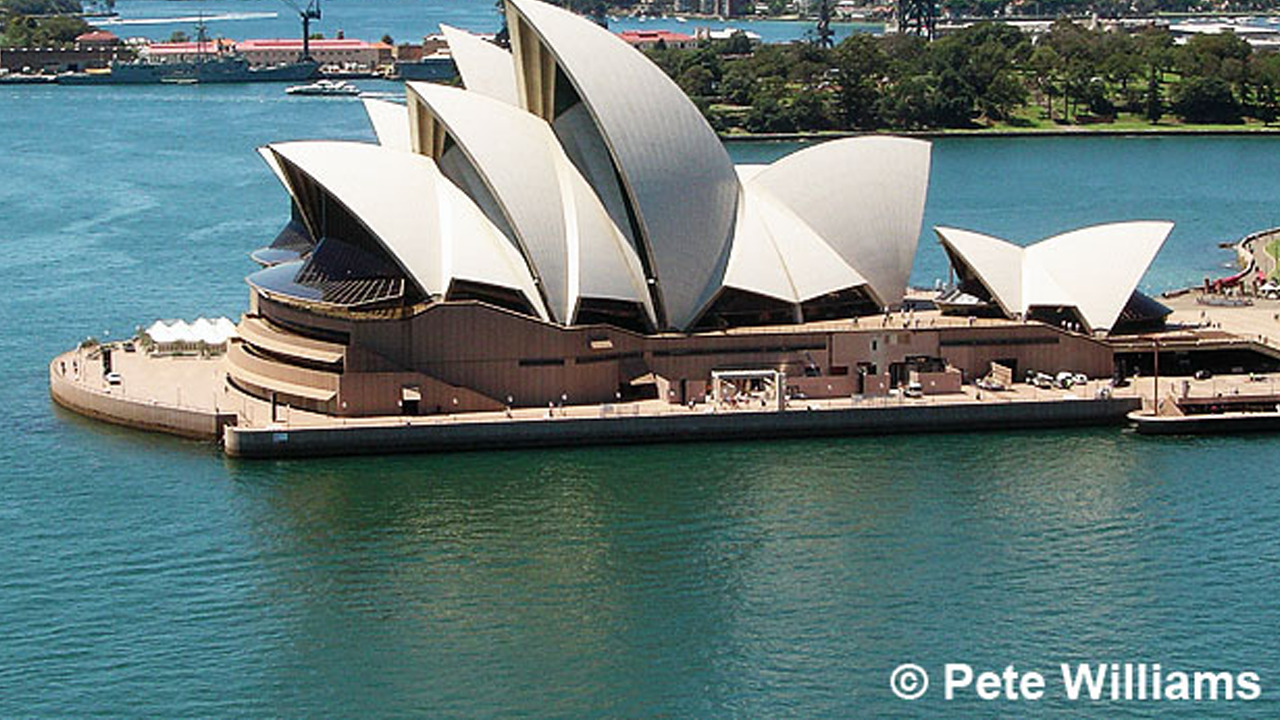
 Watermarks are annoying. I want to use images that are free and unbranded, not ones that have a logo stamped on them. If you want to use free, high quality images, use unsplash.com. Today I'll be showing you how to remove a watermark from a photo. The watermark has to be one with a small logo at the bottom, not the big stamp like 123RF's(I seriously hate them). You can remove the watermarks from photos like those, it would just take a lot of time. That's the point. But if you're using it for some non-commercial reason, this guide will help you with smaller watermarks. You'll need Photoshop, of course, as well as the image downloaded. I'm using this image, but you can use whatever you want. (Sorry, couldn't find the link! Downloaded this image a while ago.)  There it is, the annoying little watermark. Let's get rid of it. The first way to do it is by using the clone stamp tool. The clone stamp tool takes a source(which you can set by pressing option while clicking the area you want to duplicate) and then sends it to another location. Keep in mind that you can't clone the same image with the same source at different locations. Try it: select a source, then click on the left side of the screen. Then click a little bit away from it. The images are not the same. You have to set the source every time you want the same image. Anyways, you can do that with the clone stamp tool. As the arrows show in the picture below, I cloned the sources above and put them on the watermark, setting a new source every couple times I clicked. 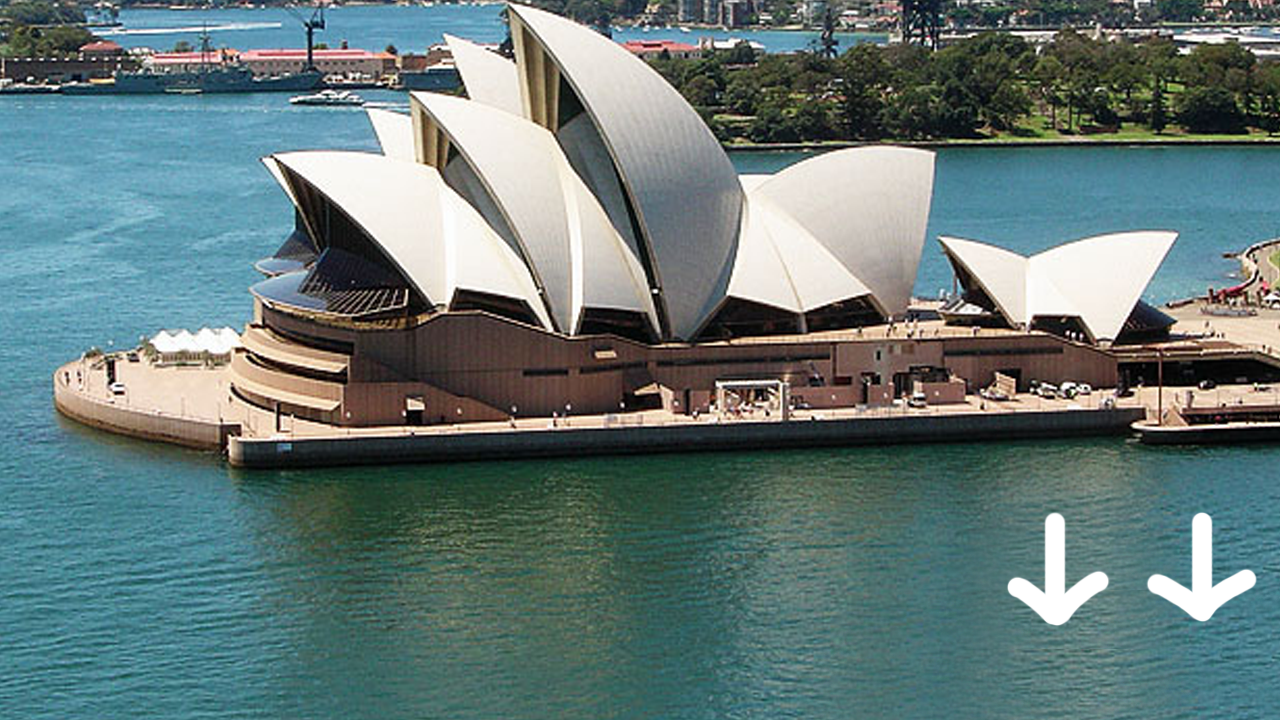 Removing the watermark that way is really easy. It shouldn't take more than a minute or so. The next way to remove a watermark is by using the Spot Healing Brush Tool. The Spot Healing Brush Tool has three modes: Content-Aware, Texture, and Proximity. Use Content-Aware for now. The Content-Aware mode tries to blend the selected piece in with the rest of the background. It's a brush tool, and it highlights the selected area in a black brush with the opacity turned down, like so: 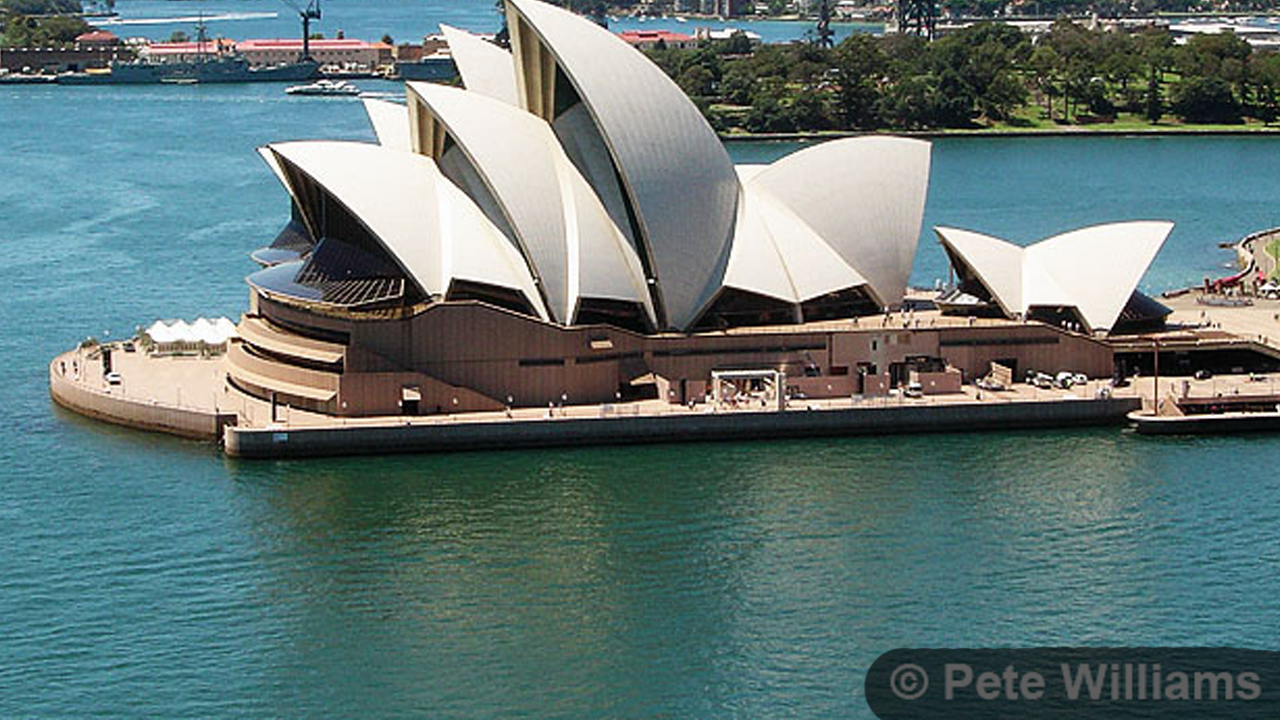 Cover the watermark and some of the surrounding environment, then let go. After a second or two, it should blend in. This is my final result: 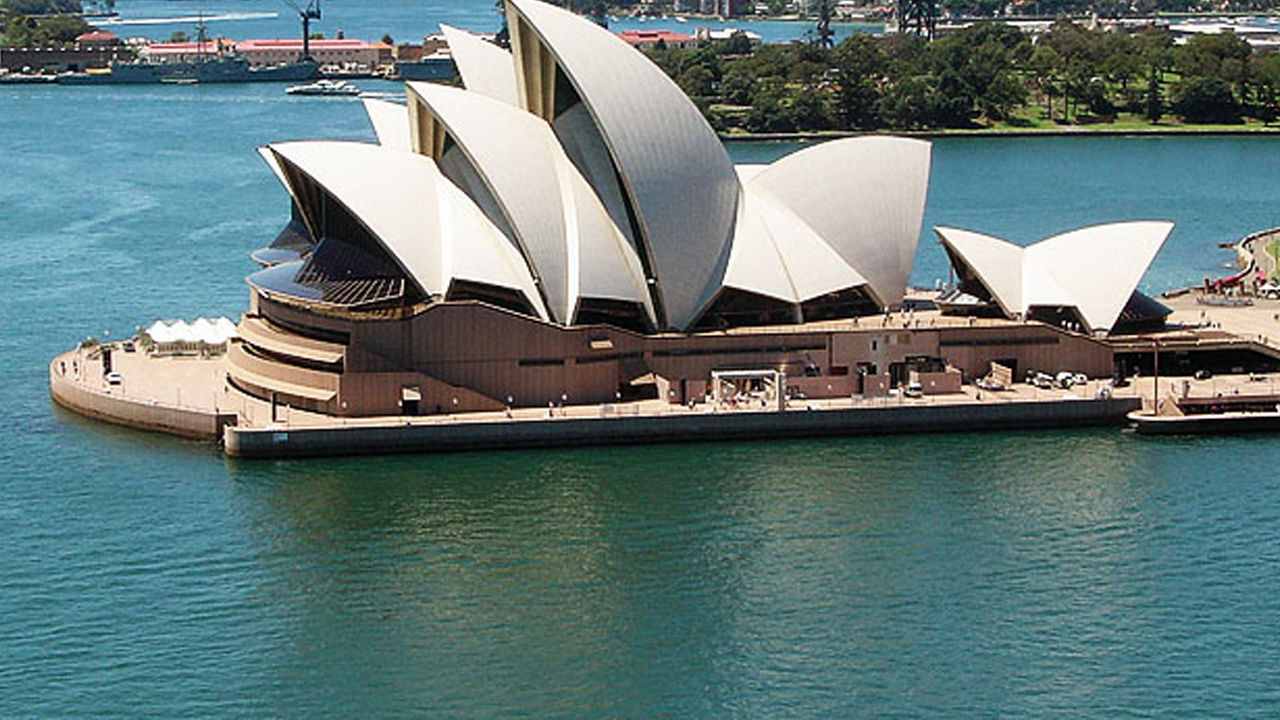 If you have something that has a complex background, it's not going to blend as well. The last method is to use the Healing Brush Tool. You have to set a source like with the clone stamp by holding option, but it takes the texture and tries to blend it in with the colors around it. It's also repeatable, so the image doesn't change.  As you can see, it's not as well blended in as it could be, but with some extra work you could make it better.
So that's how you remove a watermark three ways! If you have a method, share it in the comments. All of these are simple and should take no more than a minute.
0 Comments
Hey everyone, today I'll be teaching you how to retouch a photo. This is just a basic tutorial as there are many more techniques I may explain in a different tutorial. As always, you'll need Photoshop(I'm using CC 2017, anything from CS4 and up will work) and an image to work with. Here's the image I'm working with: https://unsplash.com/photos/JT8IWAaxpQk First, open up the image in Photoshop. Unlock the background and let's begin! Duplicate the bottom layer and set the blend mode of the top layer to overlay. Adjust the opacity as needed. I put mine to 40%.  As you can probably tell it sharpens the colors. Overlay makes lighter colors lighter and darker colors darker. I think it's a bit too light in the middle so I'll go ahead and duplicate the top layer. Set the blend mode to multiply to make it darker and set the opacity to 20%.  It's hard to see the difference here but if you actually do it, the result will show up. Next let's create an adjustment layer. I decided to put a Brightness/Contrast adjustment. For the brightness I put -6 and for the contrast I put 10. 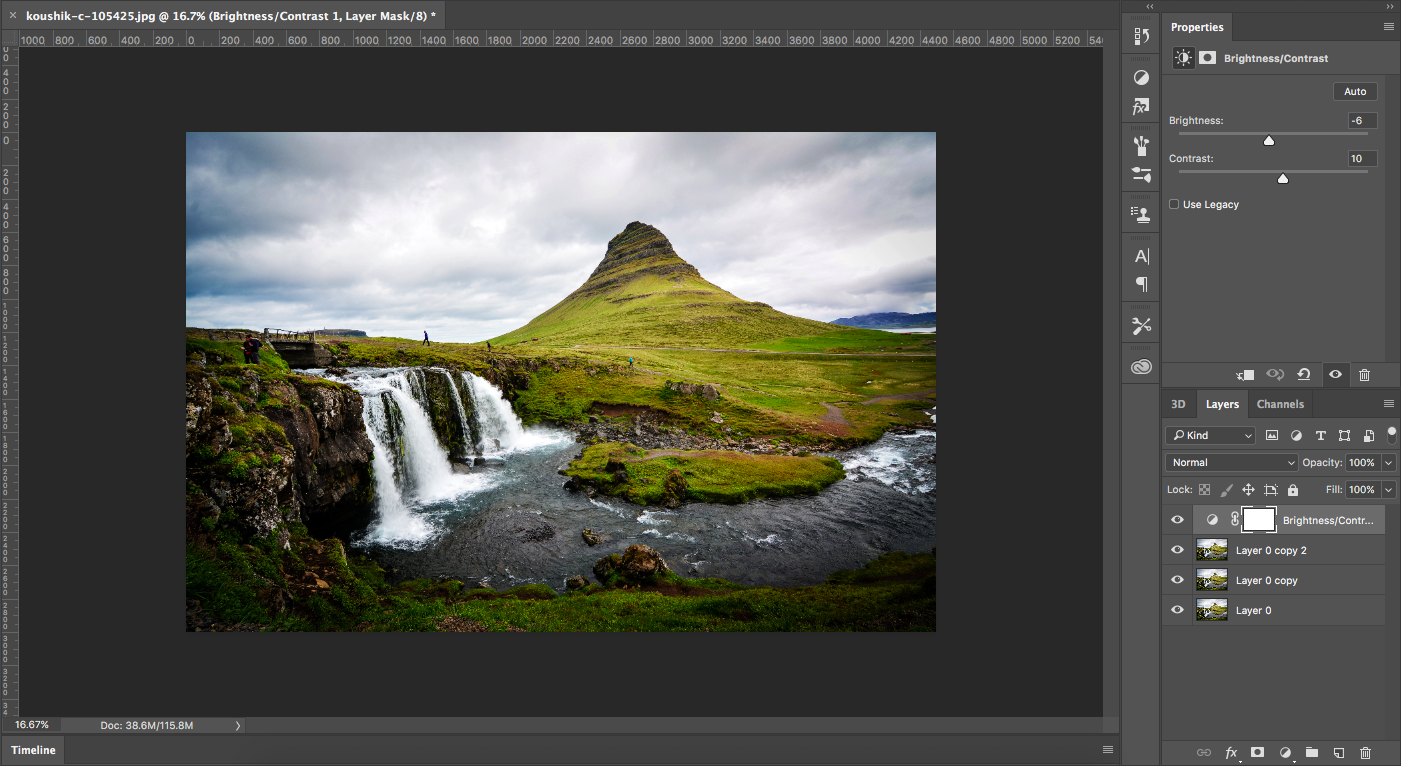 Lastly, I wanted to make the grass a bit greener so I put a Hue/Saturation adjustment layer on. I set the Hue to +10 and the Saturation to -10. This makes the grass look a whole lot greener without it looking too unrealistic.  And that's it! That's my basic method of retouching. First, add some blending layers, then adjustment layers. For blending layers I usually do Overlay, Multiply, and Lighten/Screen. For adjustment layers I usually use Hue/Saturation and Brightness/Contrast. I do occasionally use more but that's if I need something that the methods above can't provide.
Hope you learned something in this tutorial! Don't forget to subscribe to keep up with all the latest posts! |
Authori'm a 13 year old graphic designer based in california. i love to travel, play basketball, play video games, eat good food, read good books, and especially love design. my favorite type of design is modern. ArchivesCategories
All
|
