|
Hey everyone, today I'll be teaching you how to retouch a photo. This is just a basic tutorial as there are many more techniques I may explain in a different tutorial. As always, you'll need Photoshop(I'm using CC 2017, anything from CS4 and up will work) and an image to work with. Here's the image I'm working with: https://unsplash.com/photos/JT8IWAaxpQk First, open up the image in Photoshop. Unlock the background and let's begin! Duplicate the bottom layer and set the blend mode of the top layer to overlay. Adjust the opacity as needed. I put mine to 40%.  As you can probably tell it sharpens the colors. Overlay makes lighter colors lighter and darker colors darker. I think it's a bit too light in the middle so I'll go ahead and duplicate the top layer. Set the blend mode to multiply to make it darker and set the opacity to 20%.  It's hard to see the difference here but if you actually do it, the result will show up. Next let's create an adjustment layer. I decided to put a Brightness/Contrast adjustment. For the brightness I put -6 and for the contrast I put 10. 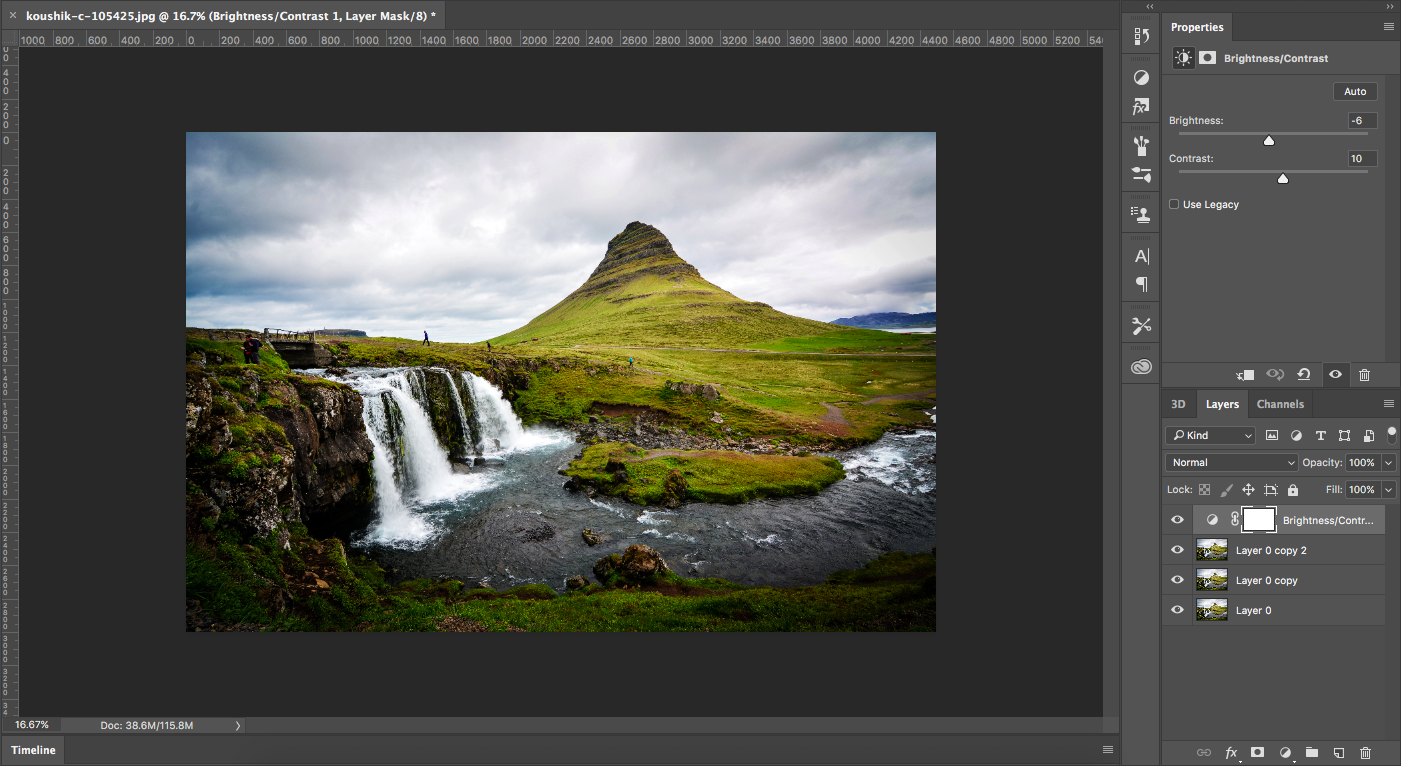 Lastly, I wanted to make the grass a bit greener so I put a Hue/Saturation adjustment layer on. I set the Hue to +10 and the Saturation to -10. This makes the grass look a whole lot greener without it looking too unrealistic.  And that's it! That's my basic method of retouching. First, add some blending layers, then adjustment layers. For blending layers I usually do Overlay, Multiply, and Lighten/Screen. For adjustment layers I usually use Hue/Saturation and Brightness/Contrast. I do occasionally use more but that's if I need something that the methods above can't provide.
Hope you learned something in this tutorial! Don't forget to subscribe to keep up with all the latest posts!
0 Comments
Leave a Reply. |
Authori'm a 13 year old graphic designer based in california. i love to travel, play basketball, play video games, eat good food, read good books, and especially love design. my favorite type of design is modern. ArchivesCategories
All
|
